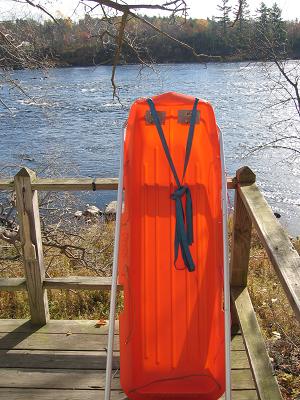
 Here is the Penob Bob
in its native habitat,
Here is the Penob Bob
in its native habitat,|
Penob Bob |
 Here is the Penob Bob
in its native habitat,
the Penobscot River.
.
These are the individual parts of the Penob Bob.
1) I started with a Paris Expedition sled. They are available here in Maine at many hardware stores for about $20.
2) The u-shaped part of the traces is made from electrical conduit. I think this piece needs to be particularly strong and straight as it goes through the blocks that attach it to the sled.
3) For the 4 sections of pole, I bought two long, extension poles for washing windows. I wanted to make the traces telescoping, so I needed two different sizes of pipe. This stuff is made from aluminum and the two diameters were already paired well together. You could make them for less money if you were able to find two sizes of pipe such that one had an inner diameter (ID) about 1/32" larger than the outer diameter (OD) of the inner piece. I found buying these telescoping poles handled all that, albeit for about $20 for both from Home Depot.
4) The waist belt came from an old external frame pack. It's very comfortable. Mine was free, but you can find them at used gear shops or you can buy them new from Kelty and/or Campmor.
5) The blue webbing is used to secure gear onto the pulk. 3 or 4 mm cord is threaded through holes drilled around the lip of the sled (this sled comes with the holes drilled). I then cross the blue straps in a lattice pattern over the gear and through the cord, tying it off at the end of the sled (note the cord is threaded through the back end of the sled also).
6) I used heavy duty pin fasteners found at my local hardware store to attach the poles to the waist belt. They consist of a large pin with a wire keeper that allows the pin to stay in the hole in the traces.
Here are details for each component of the Penob Bob.
This site was last updated 10/31/04 and is maintained by Spencer
|
|