Click on any picture for a close-up


|
Penob Bob Details |
|
Click on any picture for a close-up |
|
|
|
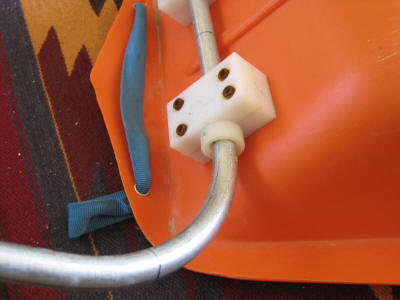
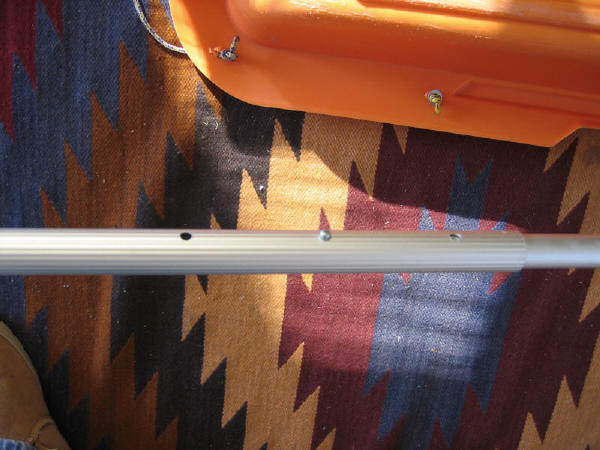
I used HDPE blocks that I obtained from a manufacturer in CT. I got them as a free sample, but I don't think this amount would cost too much. I experimented with electrical conduit u-bolts on wooden blocks and other such things. I wanted to create traditional pillow blocks that could handle the torquing of the traces, but these plastic blocks worked very well. I used a drill press with a bit about 1/16 " bigger than the outer diameter (OD) of the electrical conduit. I then drilled 4 holes in the corners for attachment bolts. After they were drilled, I used a band saw to cut the blocks in half so I could remove the u-conduit (in case of replacement) without taking both blocks off the sled itself. |
|
|
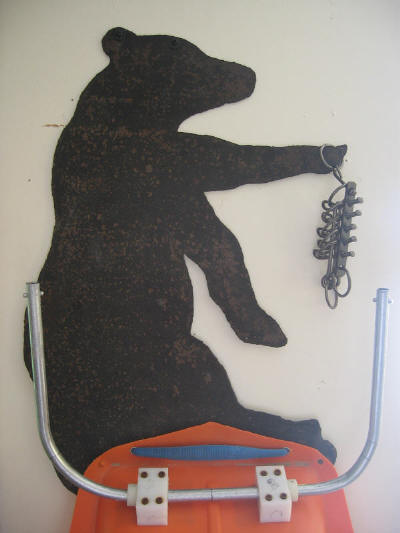
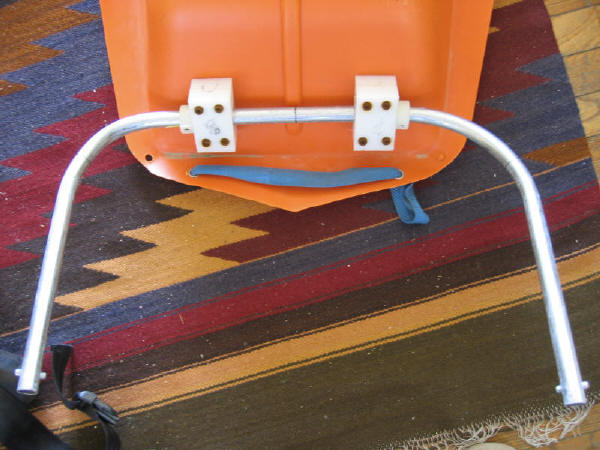
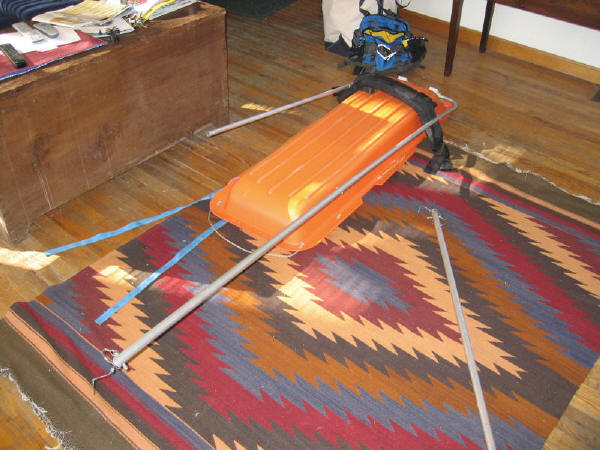
I used a section of electrical conduit for the foundation of the trace system. You have to take care to make measurements accurately and make the bends in the conduit exact. The angle of each bend needs to be the same for the pulk to pull straight. Note I marked a center line on the conduit before making either bend. |
|
|
|
|
|
I used nylon collars with stainless set screws on the outer sides of each block. These collars keep the conduit from sliding side to side within the blocks. I obtained these collars from an industrial supply company online (I've since forgotten their name, but some googling will find a supplier). |
|
|
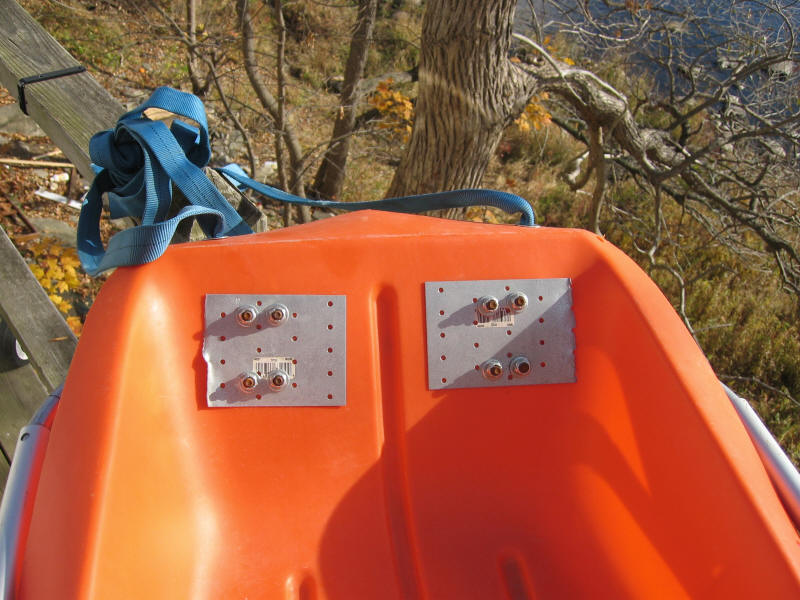
I used some metal plate on the inside of the sled to keep the blocks from pulling the bolts through the plastic. You could also use sturdy, large washers, but I thought this would be the most secure with minor weight increase. |
|
|
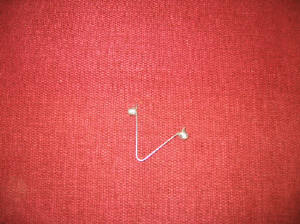
The trace system is entirely modular. It uses a series of button springs and pairs of holes. |
|
|
In each piece of trace, I drilled pairs of holes so that I could adjust the length of the trace system according to ski length, stride, terrain, etc. In practice, I keep them the same length most of the time. The traces can be adjusted from 60 inches to 8 feet. A normal setting for me with Fischer Outtabounds is 74 inches. Additionally, this feature is nice for collapsing the pulk to fit in a car without having separate pieces all over the place. I have no assembly, and therefore no chance of losing parts. |
|
|
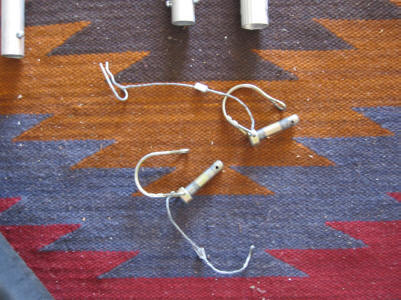
I used these spring pins that everyone is familiar with in each end of the trace sections. It took me a while to track these down, but I eventually obtained these from the same online supply house. I think they were called "button springs". |
|
|
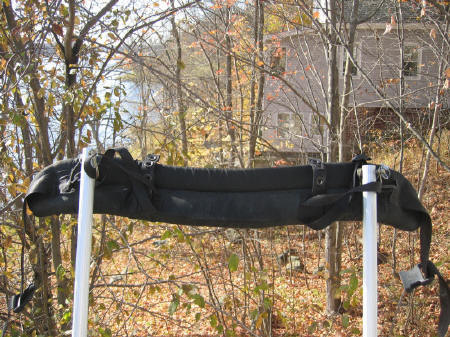
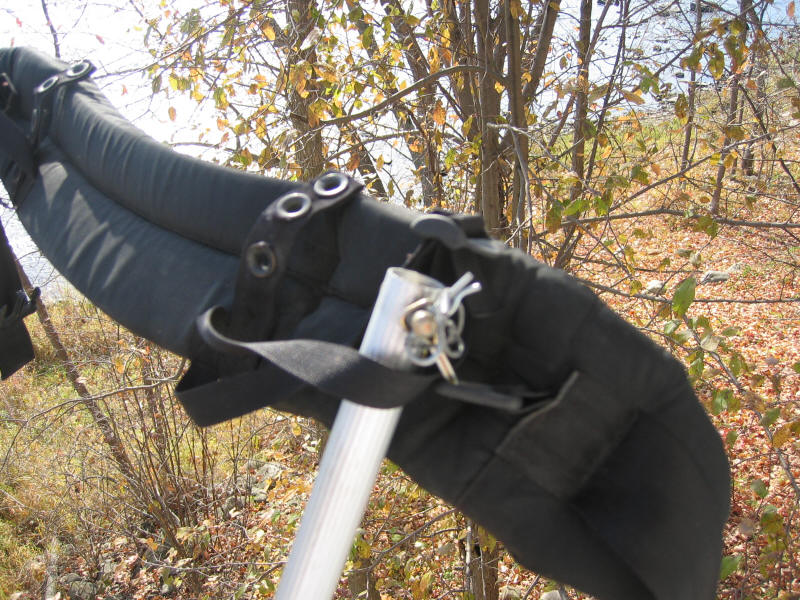
The waist belt is attached directly to the traces with pins. |
|
|
The waist belt I had came with several attachment points. Be creative, but you don't want too much play between the belt and the traces. Some folks talk about some shock-absorption, but I haven't found the need for it. |
|
|
Here is a close-up of the attachment point. |
|
|
These are the attachment pins. I don't know what they are called, but I got them at the local hardware store. They are super strong and have the attached wire hoop as a keeper. I added the small pins to the large pins as added security against the pins slipping out of the traces. They might be overkill. |
This site was last updated 11/01/04 and is maintained by Spencer
|
|